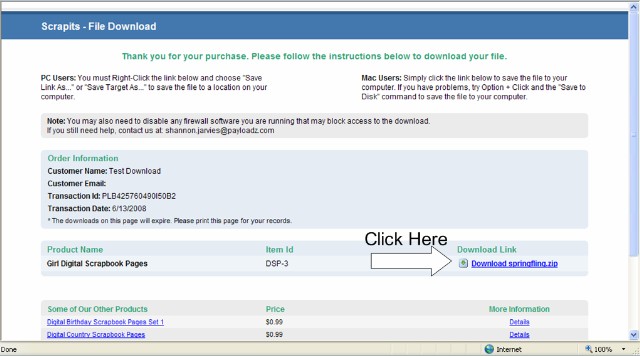
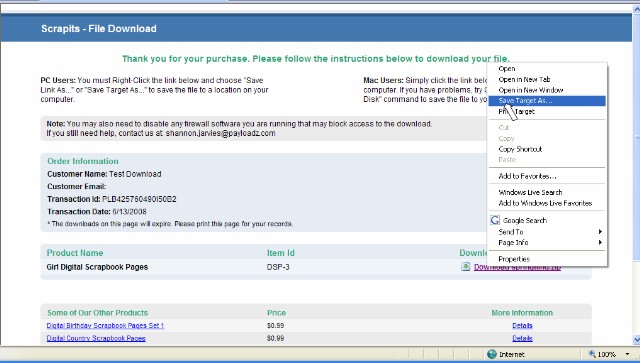
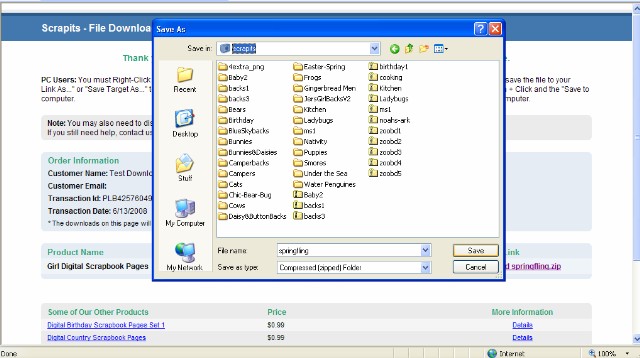
FAQ Downloadable Audio Walking Tours1. What are Audio Tours? Audio tours are downloadable MP3 files that allow you to see a city at your own pace and according to your schedule. They make it easy to sightsee without a guidebook and get an informative and interesting tour using your iPod or MP3 player. 2. Can I Download MP3 Tours Onto My iPhone or iPad? All of our audio tours use the MP3 format which is the standard digital audio compression for most of the world’s digital audio players. Although you can certainly play our tours on your iPhone, iPad and iPod, you will first need to either transfer them using an app or drag them into iTunes and then sync iTunes with the desired iOS (Apple) device. Please see FAQ #9 below for specific instructions. 3. What is the difference between MP3 and MP4 and M4A file extensions? MP3 files are used for MP3 players (i.e. non-iOS devices). MP4 and M4A files are used for iOS devices (i.e. iPhone, iPad and iPod) and iTunes. However, iTunes can accept all three file types (MP3, MP4 and M4A). MP3 files are audio only. MP4 and M4A files can contain both audio and video. If you have an iOS device and you download a file that has both MP3 and M4A files, use the M4A files. The MP4 and M4A may contain video information that can be seen on your iOS device. 4. How are the Audio Tours Organized? On most audio tours, there are a series of stops, or chapters. Each stop will tell you about a noteworthy place. Once you're done with each stop, you'll be instructed to either keep your player running for some introductory information on the next stop, or, pause your player until you reach the next stop, where you'll start your player again. 5. What do I Receive When I Order a Audio Tour Download? Our audio tour downloads come as a compressed .zip file. Most are designed to be used with the PDF map showing all the sights listed. We strongly recommend that you print out the map and use while listing the sights covered. Please check that the files work to your satisfaction before going on your journey and contact us immediately if you have any problems. 6. How Do I Download My Order? After a payment is made, an e-mail is sent to the e-mail address that you used during the checkout process. Please be patient, as it can take up to 20 minutes for the e-mail to arrive depending on network traffic. This email will contain the location of the download page. By clicking on the link in the email, you will be taken to a download page:
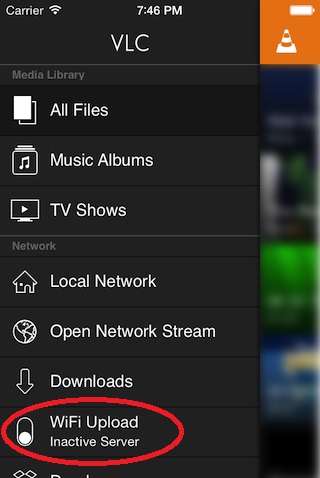
* Mac Users: Simply click the link below to save the file to your computer. If you have problems, try Option + Click and the "Save to Disk" command to save the file to your computer. 7. I did not receive my confirmation e-mail. What is wrong? You may have typed in your email address incorrectly. If so, and you have not yet downloaded your purchase, please send us your name, correct email address and the date and time of your purchase and we will do our best to help you. 8. What does it mean when it says the tour comes in a zip file? Most of our tours (the tour files and .pdf map) will be downloaded onto your computer in a zip file. Remember the folder where you downloaded them. You'll have to "unzip" the files. For PCs with Windows XP or Vista operating systems, your computers will prompt you to do it. For some other operating systems, you can right click on the zip file and then click on "unzip". Mac operating systems automatically unzip these files. 9. How do I transfer my downloaded tour onto my iPhone or iPad? There are two ways to play an MP3 file on your iOS device. 1) You can upload directly to your iPhone or iPad without using iTunes by doing WiFi uploading with an app like VLC for iOS . For VLC, use the following instructions: Step 1: Make sure your iOS device is on the same Wi-Fi network as the computer you'll be uploading from. Step 2: In the VLC app, tap on the VLC logo on the upper right of the iPhone screen. Under "Sharing via WiFi", turn the switch to "ON". An IP address will show up next to the button.
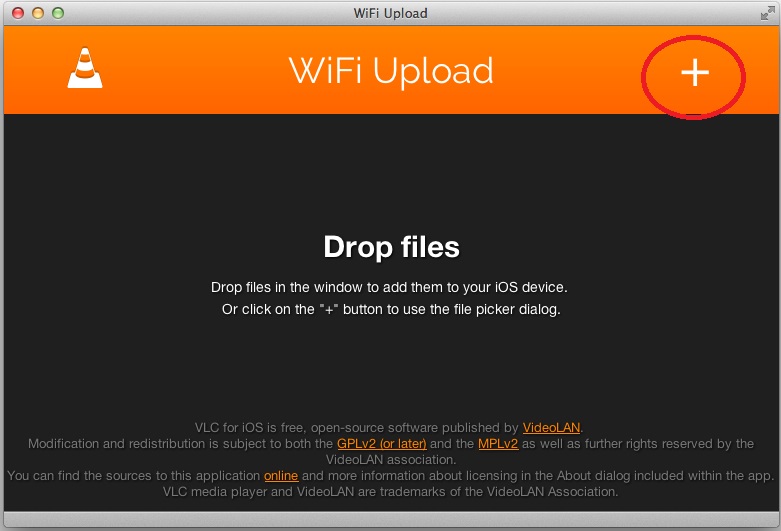
Step 3: In the Web browser of your computer, enter the IP address and port number of the VLC server running on your iOS device. Step 4: Click on the "+" button on the upper right of your computer browser screen to upload your files onto your iPhone or iPad.
2) Use iTunes to create a playlist for your tour and sync to your iOS device. Make a note of where on your hard drive you've downloaded your tour. Open iTunes, and create a new playlist for the tour. We suggest creating a playlist with the name of the tour you bought so you can find it easily when you take the tour. Then drag the files from your hard drive into the new playlist. If you're using the Windows version of iTunes, be sure that the tracks are listed in numerical order so that when you take the tour, the stops appear in the correct order. 10. What if I forget my map? It is not a problem. The maps are meant to help you, but they are not essential. Most tours will give you detailed instructions during the tour to each stop at the end of the previous one. 11. What is your return policy? In the unlikely event that you have technical problems downloading your purchase, please contact us (info@trekexchange.com) and, if we are unable to resolve the issue, we will be glad to refund your money. However, because of the digital nature of this product, we are unable to accept requests for refund after download. |

